

My first attempt at home espresso was, honestly, a disaster. I bought a cheap machine online, used pre-ground supermarket coffee, and wondered why my “espresso” tasted like weak, bitter dishwater. It took me embarrassingly long to realize the machine was never the real problem; my whole approach to espresso equipment was backwards.
This guide walks through everything you actually need to start making café-quality espresso at home: what’s essential, what’s genuinely optional, and where I’d spend your money first if your budget is tight.
If you’ve been staring at a wall of unfamiliar terms and conflicting recommendations online, take a breath. By the end of this guide, you’ll know exactly what genuinely belongs in a beginner’s setup and what can safely wait.
Table of Contents
At the most basic level, you need three things: an espresso machine, a proper grinder, and a way to measure your coffee accurately. Everything else on this list makes your life easier or your results more consistent, but those three form the real foundation.
I say this because I see so many beginners sink their entire budget into an expensive machine and grind their beans with whatever came in the box, or worse, a blade grinder meant for spices. That’s genuinely the fastest way to end up disappointed with your first setup.
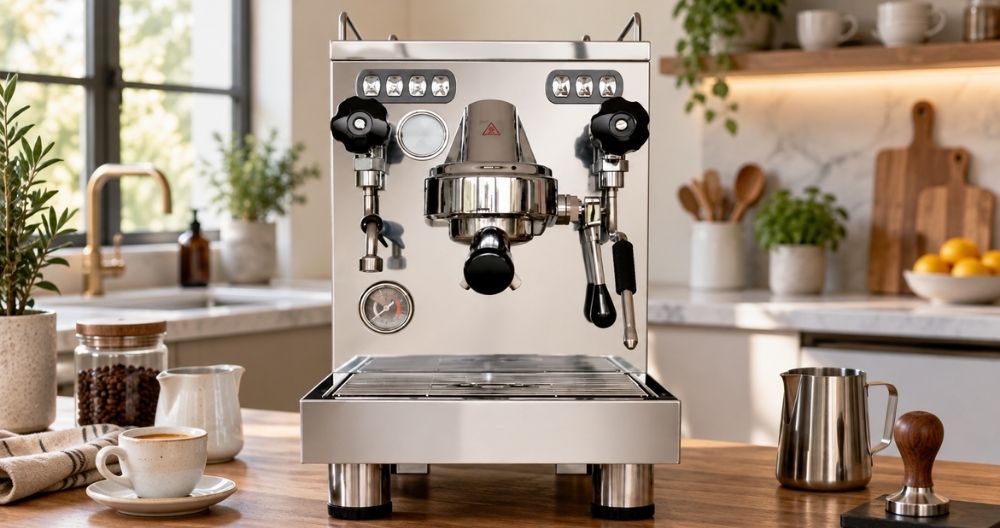
Let’s start with the obvious centerpiece. Your espresso machine is the most visible investment, but not necessarily the most important; more on that shortly.
What are the three main types of espresso machines?
There’s technically a fourth budget option worth mentioning: a moka pot. It doesn’t produce true pressurized espresso; real espresso needs around 9 bars of pressure, which a moka pot can’t reach, but it makes a strong, concentrated coffee that works beautifully as an espresso substitute for milk drinks.
I’ll say something that surprises many first-time buyers: your grinder matters more than your machine. I’ve tasted excellent espresso from a modest machine paired with a great grinder and genuinely disappointing espresso from an expensive machine paired with inconsistent grounds.
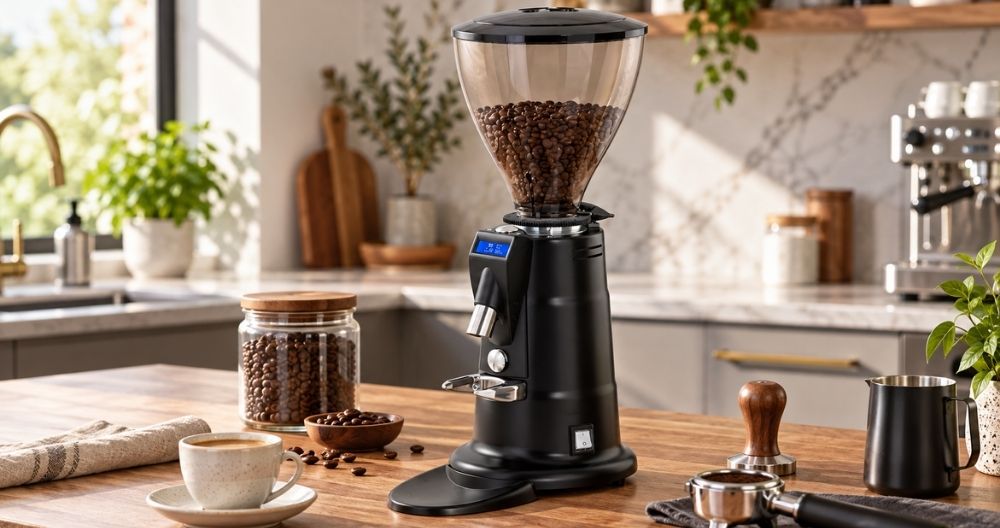
Here’s why. Espresso needs a fine, remarkably consistent grind size to build the resistance that creates real pressure and proper extraction. A blade grinder chops beans unevenly; some particles turn to dust, others stay chunky, and that inconsistency shows up directly in your cup as bitterness and sourness fighting each other.
A dedicated burr grinder, whether manual or electric, crushes beans between two abrasive surfaces to a uniform size. If you’re building a home setup for an espresso machine on any real budget, I’d genuinely recommend spending more on your grinder than people expect, even if it means a slightly more modest machine to start.
Recommended products
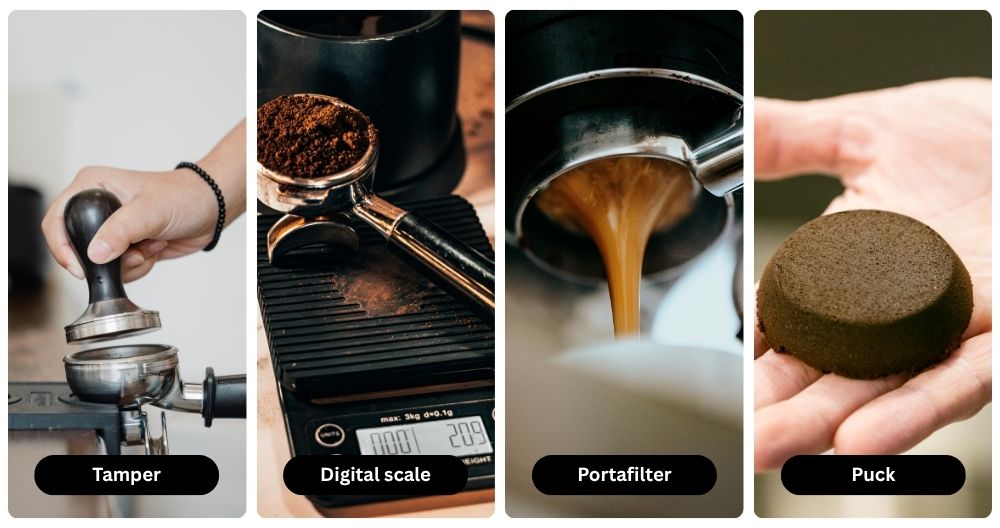
If you’ve ever felt lost by barista terminology, here’s a quick translation of the essential espresso equipment vocabulary:
If lattes, cappuccinos, or flat whites are your actual goal rather than straight espresso shots, you’ll need a stainless steel milk pitcher and a machine with a working steam wand. A good steam wand is what turns ordinary milk into the silky microfoam that makes a latte taste like a latte, not just coffee with hot milk poured on top.
This is genuinely worth checking before you buy your machine, not after. Some budget and fully automatic machines have weaker steam wands that struggle to texture milk properly, so if milk drinks are your priority, ask about steam wand power specifically.
Learn more: Steaming milk consistently for espresso
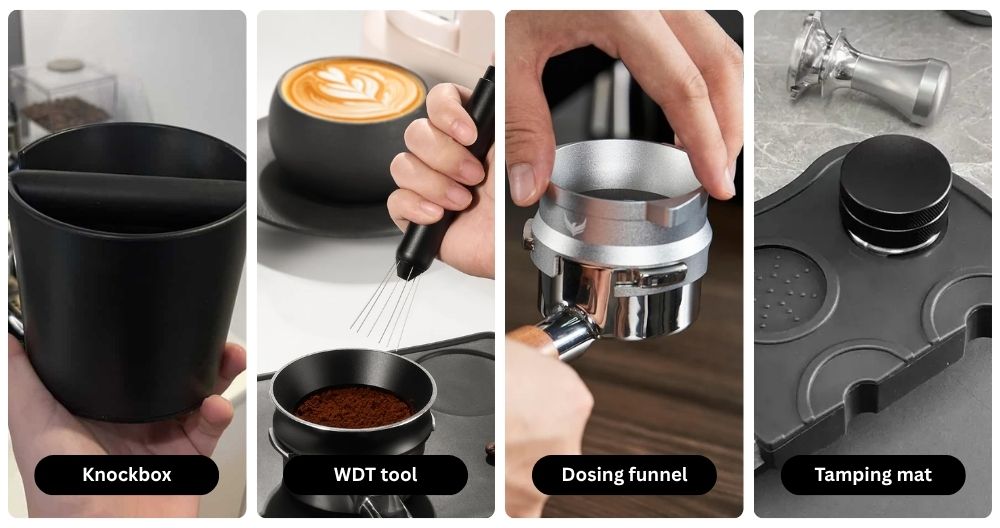
None of these are strictly essential to get started, but they genuinely improve consistency once you’re past the beginner stage.
This step is the part almost every beginner skips entirely, and it’s genuinely part of your essential espresso equipment list, not an afterthought. Coffee oils build up in your portafilter, group head, and steam wand faster than you’d expect, and that residue turns fresh shots bitter and stale-tasting within days.
At minimum, keep a small brush for your group head and portafilter basket, a microfiber cloth dedicated only to your steam wand, and either cleaning tablets or a proper espresso machine cleaning powder for regular backflushing if your machine supports it. None of this is expensive, but skipping it is one of the fastest ways to make a genuinely good machine produce genuinely bad coffee.
I learned this one the hard way too. I went almost two months without thoroughly cleaning my first machine’s portafilter, and I spent that entire time blaming my beans for a flavor problem that was actually just built-up rancid coffee oil.
I get asked this question constantly, usually by someone eyeing a machine that looks suspiciously “café-grade” for a surprisingly low price. Genuine commercial espresso equipment is built for a different job entirely, pulling hundreds of shots a day, often with a dedicated boiler for steam and brewing running simultaneously, and components engineered for years of continuous, heavy use.
A home espresso machine, even a genuinely excellent one, is built around a different use case, maybe five to twenty shots a day, with more time to cool and reset between them. That’s not a downgrade so much as a different design goal; you’re simply not going to run a home machine at café volume without it struggling, and you shouldn’t need to.
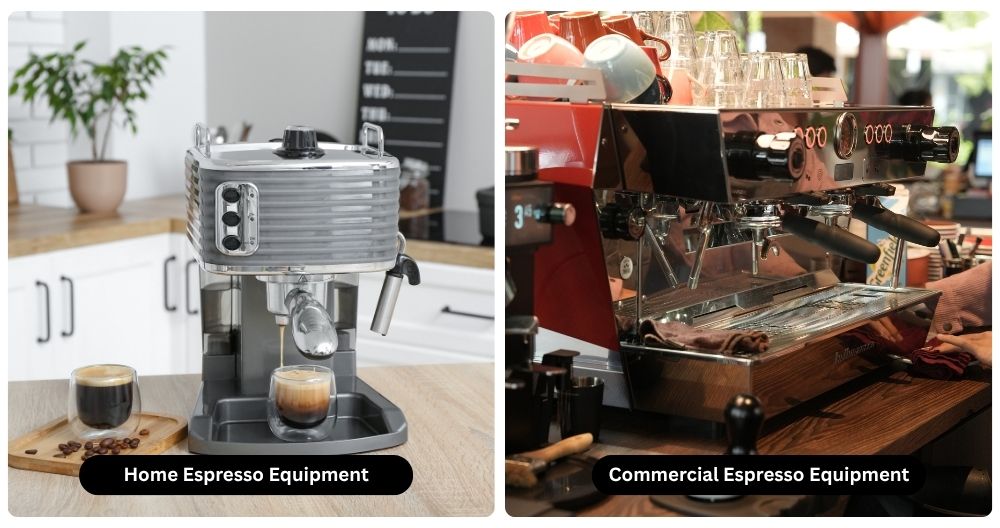
If you’re setting up a small business rather than a home kitchen, this is exactly the point where I’d point you toward genuine commercial-grade equipment instead of a home machine, since the two really aren’t interchangeable long-term. Trying to run a home-grade machine at café volume usually ends in expensive breakdowns and inconsistent shots right when you can least afford either.
This distinction matters even at the accessory level. Commercial setups often use larger, more durable tampers and heavier-duty grinders rated for continuous daily use, while home espresso equipment is built around intermittent use with time to rest between shots. Buying commercial-grade accessories for a home setup isn’t wrong; they’ll certainly last, but it’s rarely necessary spending for someone making two or three drinks a day.
Learn more: Where to buy a coffee machine in Malaysia
Here’s roughly how I’d break down budget expectations if you’re shopping for a good home espresso machine in Malaysia right now.
If you want a genuinely reliable option in that intermediate-to-premium range, our Carimali CM280 pump espresso machine is one I recommend often for home and small office setups. It’s built with the consistency of commercial-grade engineering but sized and priced for a home kitchen or a small team, genuinely one of the better bridges between hobbyist and serious setups I’ve come across.
Once your equipment is sorted, here’s roughly how the process comes together.
Learn more: Perfect latte art guide
If your budget doesn’t stretch to everything at once, here’s the order I’d actually buy in:
I know it’s tempting to lead with the machine since it’s the most exciting purchase, but a great grinder paired with a modest machine will consistently outperform the reverse. I’ve watched this play out in person more times than I can count, someone proudly unboxes a beautiful new machine, then gets genuinely frustrated a week later when their shots still taste flat, simply because the grinder never got the same attention
Since budgets and priorities differ, I’d actually break this into three honest paths rather than one universal answer.
A beginner-friendly automatic machine with a built-in grinder. If you want good results with a minimal learning curve, a machine that grinds and doses automatically removes a huge variable. You’ll trade a little control for genuine convenience, which is a completely reasonable trade for many people.
A manual setup gives you more control and, honestly, better quality for the price. A semi-automatic machine paired with a separate quality grinder costs less than a comparable all-in-one, and it teaches you real technique, which pays off in cup quality as you improve.
A budget-friendly option. A basic semi-automatic machine, a decent manual or entry-level electric burr grinder, and a simple digital scale make a budget-friendly option. It’s not fancy, but it’s a genuinely capable starting point, and it’s exactly where I’d tell a nervous first-time buyer to start.
Not technically true, pressurized espresso, no. Real espresso requires roughly 9 bars of pressure, which genuinely needs a dedicated machine or a manual lever device built for that job.
That said, you can get impressively close with the right tools. A moka pot produces a strong, concentrated coffee that works well in milk-based drinks even without true crema. A pressurized AeroPress attachment gets you closer still, producing a small, concentrated shot with a passable crema layer. Neither is identical to genuine espresso, but both are worth knowing if you’re not ready to commit to full espresso equipment yet.
Learn more: How to make a good cup of espresso?
Neither is inherently healthier; they’re really the same plant, prepared differently, and the honest answer depends on how much you drink and what you add to it.
Espresso is more concentrated per ounce, but a standard shot is a small serving, roughly 30ml, so it often contains less total caffeine than a full cup of drip coffee. A typical espresso shot carries around 63mg of caffeine, while an 8oz cup of drip coffee often carries closer to 95mg, simply due to serving size.
What actually matters more for either drink is what you add to it. Black espresso or black coffee, in moderation, fits comfortably into most healthy adults’ routines. Loading either one with sugar and cream is where the health conversation genuinely shifts, regardless of which brewing method you started with.
Building a home espresso equipment setup doesn’t have to mean spending a fortune on day one, and it definitely doesn’t mean the most expensive machine automatically wins. Start with a good grinder, a machine that matches how you actually want to learn, and a scale to keep you consistent. Everything else can wait until you know exactly what your own routine actually needs.
My disastrous first attempt eventually turned into a setup I’m genuinely proud of, and it happened one honest upgrade at a time, not one lucky expensive purchase. Yours can too, and you’ll likely get there faster than I did, since you’re starting with a proper list instead of guessing in an electronics store aisle the way I did.


"Where can I actually find good coffee beans at Giant?" I get some version of this question constantly, usually from...
I keep a small shelf at home just for coffees I'd hand to someone who says, "I don't really taste...
I once watched a new kiosk owner near a KL office tower change her entire menu three times in her...
Walk past any LRT station, office tower, or campus entrance in the Klang Valley these days, and you'll spot at...
My sister has exactly one coffee ritual: rip open a sachet, pour hot water, stir, done. No grinder, no scale,...
A few years back, a first-time café owner sat across from me holding two supplier quotes, both for "premium Arabica...


